
INTRODUCTION
Acquisition of podiatry radiographs is a fundamental skill frequently used by equine practitioners. However, positioning and hoof preparation artifacts can make a big difference in the usefulness of the acquired information. Th e purpose of this discussion is to clarify the techniques that can help provide consistent images of high diagnostic value and to point out ways to recognize and quickly correct positional artifacts.
The views
For this discussion, five primary podiatry views will be considered: latero-medial (lateral), horizontal dorso-palmar/ plantar (DP), dorsal-45 degree proximal-palmarodistal (45° DP), dorsal-45 degree proximal-palmarodistal (60° DP), and palmar-45 degree proximal to dorsodistal oblique (flexor skyline). Oblique radiographs of the pastern and P3 are beyond the scope of this discussion. For the remainder of the discussion, abbreviated terminology will be used. For the remainder of the discussion, the shortcut terminology will be used, and “palmar” will be assumed to imply palmar or plantar.
LATERAL VIEW
Defining what constitutes a lateral radiograph may seem to be a simple task. But ultimately, the question is determined by the specific region of interest in the study. For example, a lateral of a fetlock is never a good lateral of the foot or pastern: in the front because the metacarpal condyles are rotated a few degrees (lateral condyle rotated palmarly), and in the hind, because the fetlock is not horizontal (the lateral condyle is distal to the medial condyle). Beam divergence also causes an exaggeration of the misalignment, partly through parallax error.
In terms of the digit, there seems to be a debate about what is considered a “true” lateral. Instead, it should be considered that there are two different lateral views, both of which are correct and serve different purposes: the traditional lateral and the podiatry lateral.
The traditional lateral view is a horizontal beam view, typically centered on the coronary band and taken perpendicular to the long axis of the foot. Th is view shows the articular margins of the proximal interphalangeal joint (PIP) well and aligns well with the distal interphalangeal joint (DIP). However, this positioning usually shows divergence of the wings of the third phalanx (P3), as well as the positioning block, making podiatry measurements inaccurate.
The podiatry lateral view is centered just above the positioning block, with a horizontal beam passing close to the level of the solar margin of P3. By aligning with this portion of the bone, overall bony alignment of the digit can be more accurately assessed. Th is positioning, however, means that the PIP joint and, to varying degrees, the DIP joint may show some slight proximal-distal obliquity. After acquiring podiatry information, if there is a question about the joints, a traditional lateral should be acquired.
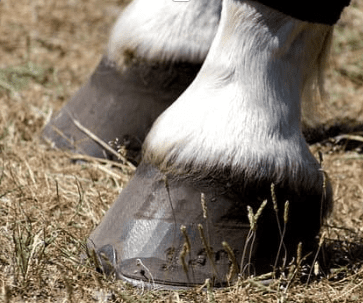
- The frog is almost always perpendicular to the DIP joint. By aligning the frog with the long axis of the block, the alignment of the radiographic beam angle relative to the block will align well with the joint. Whether planning to radiograph the opposite foot or not, placing it on a block equilibrates weight-bearing and results in straighter positioning.
- The block should be constructed relative to your X-ray generator: the crosshairs should be about 1 centimeter above the top of the block.
- Vertical positioning of the cannon bone helps with dorsal palmar alignment, but also with medial-lateral alignment: abduction of the limb will cause the condyles of distal P2 to be out of alignment.
- Radiographic calibration is ideal for accurate measurements. If a calibration block is used, the foot should be placed directly over the calibration markers. Otherwise, the foot is generally placed against the medial edge of the block, and an external marker of known length can be taped onto the foot. The disadvantage of this type of marker is that it can mask the hoof wall.
- Barium paste can be used as a marker to delineate the dorsal hoof wall. This allows for identification of the dorsal hoof wall, the level of the hairline, and any undulations in the hoof. Placing the paste in a syringe and capping it between uses allows for a regulated band of paste on the hoof.
HORIZONTAL DP VIEW
This view is primarily valuable for medial-lateral balance assessment, but cystic lesions in the navicular bone also show up well on this view. Positioning is similar to the podiatry lateral in terms of beam height. This view may seem simple, but quirks of anatomy can make alignment challenging. In some horses, particularly with abnormal pastern conformation, alignment can be difficult. In this case, a DP aligned with the frog and a second aligned with the pastern may be necessary.
What should be horizontal and what should be vertical?
Assessment of balance is not universally agreed upon. The two methods typically used are comparison of the sole depth at the lateral and medial margins, or assessment of the facets of P3. The primary problem with assessing the solar margin is that it assumes that the solar margin is symmetrical, which is often not the case, and this margin frequently is not parallel with the facets of the DIP joint. The author’s view is that the DIP joint in a normal horse should be horizontal. In horses with low solar plane angles, the facets can be difficult to assess, but the nutrient foramina associated with the terminal arch are consistently visible and consistently align with the facets of P3, so they can also be used to define a horizon line.
The condyles of distal P2 should also be horizontal, and the long axis of the pastern vertical, but this is mainly affected by the limb position. Because the collateral ligaments in the elbow, carpus, fetlock and pastern allow minimal collateromotion, it can be said that P2 follows the limb and P3 follows the ground surface. The collateral ligaments in the coffin joint allow for moderate collateromotion to accommodate this potential disparity. The most common reason for seeing the condyles of distal P2 deviate from horizontal is through abducted placement of the limb.
Joint width disparity
There are four common circumstances that lead to disparity in the measurement of the medial and lateral P2-P3 distances. The most common is an abducted limb position. The next is a normal limb position, but a medial-lateral imbalance, where the facets of P3 are not horizontal but the condyles of distal P2 are. The next is a normal limb position but a laterally sloping floor, where the hoof will follow the angle of the floor and P2 will follow the limb. The last is unilateral erosion of articular cartilage. In all but the last, the cartilage thickness will be normal on one side and abnormally enlarged through distraction of joint surfaces on the opposite. In the case of cartilage erosion, the normal side is the wider of the two, with excessive narrowing on the abnormal side due to cartilage loss.
Tips for a good horizontal DP view:
The extensor process should be centered on the midline of P2. If not, see the rotational obliquity section below.
45° DP VIEW:
This view is either obtained by placing the cassette inside a tunnel that the horse stands on, or as an upright pedal view, where the sole is vertical, and a horizontal beam is used. This view is primarily useful for the view of the solar margin and shows the proximal border of the navicular bone well.
Position the limb as for the podiatry lateral. The alignment of the cannon is most critical here. Remember to avoid abduction of the limb.
Tips for a good 45° DP view:
- Cleaning and preparing the sole is somewhat time consuming, but very helpful for views shot through the sole. A freshly trimmed foot is ideal, but this is not always possible. Trimming away loose, crumbly sole and excessive frog can be helpful. A stiff-bristle brush and water, after using a hoof pick will remove most debris well. Using Play- Doh to pack the foot works well, but care should be taken to pack it well into the frog sulci. A dorsal-to-palmar pressure will allow the material to work deeply into the sulci, displacing gas. By continuing to push the material out palmarly, the Play-Doh will extrude out the back, carrying debris with it, which can be discarded. Ideally, the material stays slightly below the level of the sole. Artifactual lines are easily created with excessive packing overlapping the sole
- Remove shoes whenever possible.
- If using a tunnel, align the foot with the tunnel to allow for ease of beam alignment.
- Using a slightly lighter technique for this view may improve resolution of the solar margin.
65° DP VIEW:
Like the 45° view, either a tunnel view or an upright view, with the sole at a steep but not vertical, angle is used. The upright view can be done by stabilizing the limb by hand, but purpose built stands are available, such as the Podoblock. This view’s focus is on the navicular bone, particularly the distal margin. The ideal view will separate the distal margin from the DIP joint. The flexed position used in the upright pedal technique causes the navicular bone to align relatively parallel to the cassette, minimizing distortion.
Tips for a good 65° DP view:
- The foot should be prepared as for the 45° view.
- Although this is commonly described as a 65° view, each foot has different conformation. Starting with a lateral view can help guide the appropriate angle. For the tunnel view, this angle can be anywhere from 55° (in more upright horses) to about85° (in low-angled horses). Similarly, Podoblock offers blocks with sole angles ranging from 45° to 65°, as well as an add-on wedge to optimize angulation for each foot.
FLEXOR SKYLINE VIEW:
This view is acquired in a tunnel, with the foot in a hyperextended position placed well behind the opposite limb. This view shows the flexor cortex well, as well as the delineation between the cortex and medulla. The palmar eminences are also shown well.
Tips for a good flexor skyline view:
- The foot should be prepared as for the 45° view
- As for the 65° view, each foot has different conformation, so the proximal-distal angulation should match the angle of the flexor cortex, making the lateral view a helpful guide. In most horses, this is approximately 45° but it can range from 30-60°.
- While ideally, a generator stand is utilized to minimize radiation exposure, this is not always an option. When the generator is hand-held, there is a tendency for the beam to have a lateral-medial artifactual inclination to avoid the abdomen. To line up correctly with the digit, a hand-held generator can be held sideways on the knees in a slight squatting position, with the operator facing the abdomen and using the crosshairs to align with the digit.
- Because this view projects the image onto the cassette well forwards of the foot, it is helpful to place the foot as far back on the block as possible so that the cassette is further forward and can receive the full exposure.
COMMON POSITIONAL ARTIFACTS, THE LATERAL:
Dorsal-palmar obliquity
If one of the condyles of P2 is projected dorsal to the other, there is some degree of dorsal-palmar obliquity. It can be difficult to tell if the beam angle is coming slightly from the front or back. Because the lateral condyle is farther from the cassette, it may appear slightly enlarged relative to the medial condyle, but this can be difficult to discern. If the frog is lined up parallel to the block, then usually a beam angle perpendicular to the block will align well with the coffin joint. The heel bulbs are typically parallel with the coffin joint as well, so they can also be a good alignment tool. Sometimes, trial and error are the best way forward.
Proximal-distal obliquity
If one of the condyles of P2 is projected proximal to the other, there is some degree of dorsal-palmar obliquity. For podiatry radiographs, if the block has been matched to the desired height for podiatry laterals, there should be good alignment with the solar margin and the DIP joint. If the floor is not flat, it can be difficult to align well. In this case, adding material under the blocks and holding the generator above the ground aligned at the desired level, can be effective. Horses with a significant medial-lateral imbalance will appear to have proximal-distal obliquity, because relative to the beam, there is obliquity. To acquire a lateral aligned with the coffin joint, the beam will need to be angled to match the facets of P3. At times, acquiring the horizontal beam DP and then coming back with the angle in mind can be helpful. Horses with very upright feet, excessive sole depth, or a shoeing package will have proximal- distal obliquity, because the beam is set for a much lower solar margin. With beam divergence, the portion of the beam encountering the solar margin is angled up. To correct this, estimate where the solar margin is and center the beam at that level.
COMMON POSITIONAL ARTIFACTS, THE HORIZONTAL DP:
Abducted limb position
This is the easiest positional artifact to recognize and correct: reposition the limb so that the cannon bone is plumb.
Rotational artifact
This is a more elusive artifact and is typically confused with the abducted limb artifact or sometimes malconformation. This artifact is seen on the horizontal DP and is most easily identified by lateral or medial displacement of the extensor process. The palmar eminence on one side will be exaggerated because it is displaced in the opposite direction as the extensor process. Another way to differentiate between rotational and abducted limb artifacts is to evaluate the shape of P2. In an abducted limb, P2 will have a rectangular shape, with the proximal and distal margins perpendicular to the angled long axis of the bone. In rotational artifact, the proximal and distal margins are typically horizontal, while the bone appears to be angled because part of the slope of the pastern is visible. As an example, if the extensor process appears to be displaced medially relative to P2, then the lateral palmar eminence of P3 will be rotated into view. In this case, it would be a dorsal- [5°] lateral-palmaromedial oblique. Correction in this case would mean moving the generator medially a few degrees. (Or vice versa for lateral displacement of the extensor process).
False horizon artifact
This is an artifact that comes from the cassette not being held uniformly against the ground but slightly rotated. Because the image we see is dictated by what the cassette ” sees, ” if it is somewhat tipped, then our view is tipped as well. But because the image is projected on our monitors (lightboxes) as if the cassette were horizontal, it creates the false horizon illusion, where the viewer’s eye uses the frame as a reference. The positioning block will appear to be angled, showing the true horizon, from which alignment assessments should be made.
COMMON ARTIFACTS, THE 45° AND 65° DPS:
The most common artifacts for these views, as well as for the flexor skyline view, are not positional, but packing defects. Radiolucencies from trapped gas and radiopacities from mineral debris can impair the viewer’s ability to make a clear diagnostic assessment. Repacking until the artifacts are gone is indicated. Some authors recommend paring the sole, frog, and sulci of the foot first to clean out the recesses well to remove debris, in which case they advocate not packing the foot.
Rotational artifacts
While these two views are subject to rotational artifacts, these do not typically affect the diagnostic quality significantly.
Proximal to distal obliquity
Due to conformational variety, what may seem to be a correct beam angle may not be. To determine the degree of obliquity, the position of the distal border of the navicular bone relative to the visible margin of the DIP joint can be used: a lower beam angle brings the navicular bone closer to the joint margin, and a higher beam angle projects the bone higher onto P2. Overlap with the DIP joint makes evaluating the distal margin difficult, and if the navicular bone appears too high, it is being projected through a larger amount of bone.
COMMON POSITIONAL ARTIFACTS, THE FLEXOR SKYLINE:
False sclerosis
While the flexor skyline can reveal true sclerotic changes within the medulla of the navicular bone, this should be interpreted with caution. A slight change in angulation can cause the appearance of sclerosis, which can be corrected by proper alignment of the beam with the flexor cortex. If the bone appears overly dense, a repeated view or views with slight angle variations should be obtained to make certain the findings are real.
False sagittal ridge cysts
True sagittal ridge cysts can be seen on the flexor skyline view, but it is common to see a summation artifact associated with the sagittal ridge. The proximal and distal aspects of the flexor cortex vary from a moderate peak to almost flat; the superimposition of the straighter line and the peak of the ridge creates this artifact.
Superimposition of the fetlock
A line of increased opacity can occasionally be projected over the navicular bone from the palmar fetlock, associated with the soft tissue structures of the palmar fetlock region, which can be falsely interpreted as an area of sclerosis within the bone. Scrutiny reveals the curvilinear line continues beyond the bone. This is most common in horses with upright conformation, requiring a steeper angle for good alignment with the flexor cortex of the navicular bone. This artifact can be ignored, provided the artifact does not otherwise impair visibility and alignment is otherwise good.
Widened sagittal ridge artifact
The sagittal ridge of the navicular bone can appear wider or irregular if there is lateral-medial obliquity “smearing” the ridge. In a well-aligned flexor skyline view, a line drawn along the frog should be on the midline of the navicular bone, P3, and P2. Correcting the alignment will resolve this artifact.
Summary
While some artifacts are inevitable, recognizing and resolving common artifacts is straightforward and improves resolution and alignment necessary for accurate measurements in podiatry radiographs.
Selected References
- T O’Brien. (2005). O’Brien’s Radiology for the Ambulatory Equine Practitioner (1st ed.). Teton NewMedia. https://doi.org/10.1201/ b16177
- R Redden. (2002). Radiography of the Equine Foot. Nanric
- M Weaver, S Barakzai. (2009). Handbook of Equine Radiography. Elsevier. https://doi org.wikipedialibrary.idm.oclc.org/10.1016/ C2009-0-35460-4
About the Author
Matt Durham, DVM, DACVSMR

Dr. Matt Durham graduated from the school of veterinary medicine at UC Davis in 1996, and then performed a rotating internship at Alamo Pintado Equine Medical Center. After briefly practicing ambulatory medicine in southwest Washington, he returned to Alamo Pintado for two years, where he performed the majority of the ultrasound, scintigraphy, and computed tomography examinations, taught radiographic technique to the interns, and started weekly imaging rounds. In 2001, he completed a year-long fellowship in cardiology and ultrasound at New Bolton Center. He spent the following 20 years at Steinbeck Country Equine Clinic, where he concentrated on lameness and imaging and led weekly imaging rounds, enjoying the mix of ambulatory and in-clinic practice. In 2015, he became board certified by the American College of Veterinary Sports Medicine and Rehabilitation. For the last two years, he has been the Senior Technical Services Veterinarian for Platinum Performance. Matt continues to lecture on sports medicine, with an emphasis on ultrasonography and anatomy, as well as on targeted nutrition.